> For the complete documentation index, see [llms.txt](https://support.suptask.com/llms.txt). Markdown versions of documentation pages are available by appending `.md` to page URLs; this page is available as [Markdown](https://support.suptask.com/setup-and-configure/online-web-forms.md).
# Online Web Forms
Submit tickets via online Web forms
{% hint style="warning" %}
Web forms is a part of the Custom plan. Additional cost might apply.
{% endhint %}
## Overview
You can automatically create support tickets from online web forms. Simply send form submissions to your [Suptask email integration](/integrations-automations-and-workflows/email-ticketing-setup.md), and your team can reply just like any other ticket where the requester will receive the reply via email.
***
### Why Use Web Form to Ticket Integration?
This setup is perfect for capturing:
* Customer inquiries from your website
* Internal requests from your intranet
* Issue reports or feedback submissions
By connecting your form tool (like **Tally Forms**) to Suptask’s email integration, each form submission becomes a trackable, reply-ready support ticket.
***
### What You’ll Need
* An active email integration in Suptask
* A web form tool like Tally, Clickup or Form Craft.
* Access to set up form notifications (we recommend using Tally's "Self email notifications")
* Suptask email integration is required to be enabled in one of your Suptask Inboxes.
***
### Setup Guide
This setup guide is using Tally Forms as an example, same setup applies to other form vendors (Formcraft, Clickup etc).
Follow these steps to forward form submissions to Suptask:
1. **Create your form** in Tally.\
Add fields like:
* **Name**
* **Email** (this will be used later in Suptask to help set the requester)
* **Message or Description**
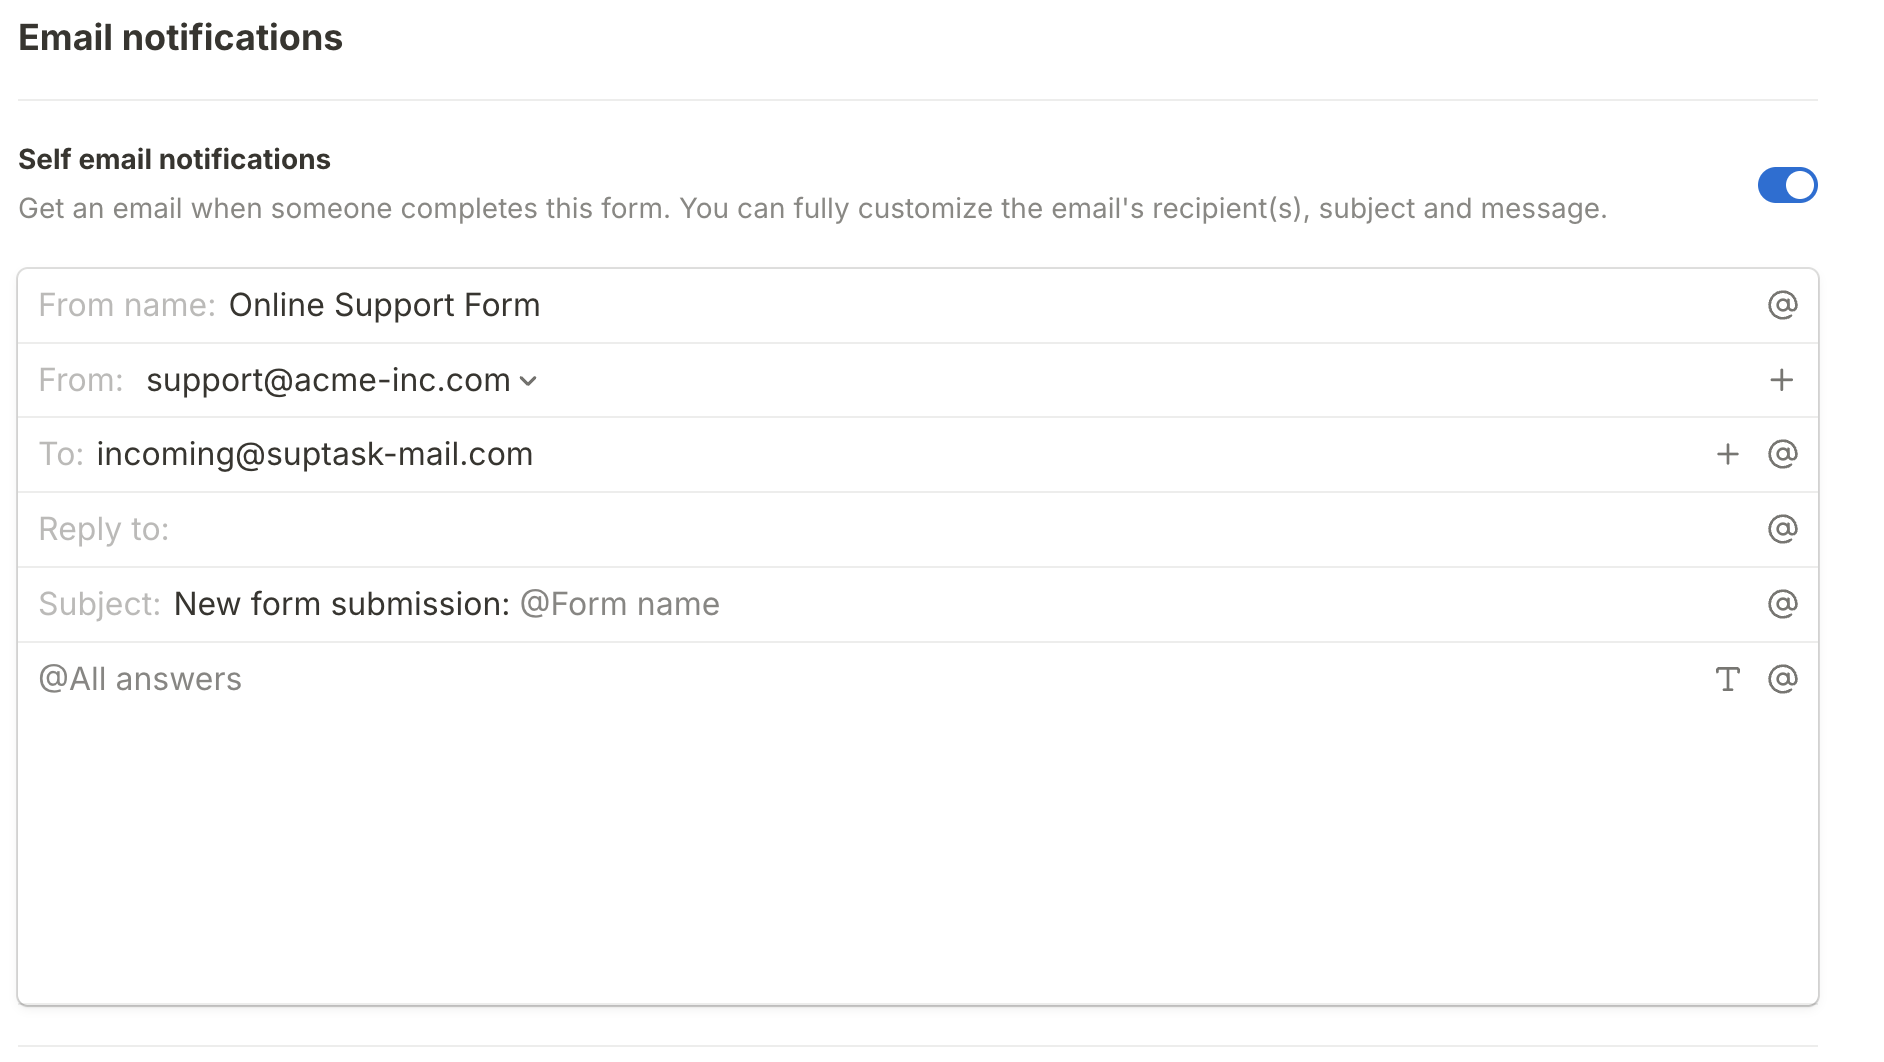
2. **Go to your form’s “Email Notifications” in the forms settings**
3. **Enable “Self email notification.”**
4. **The From email field needs to be the same email that you have enabled with the** [**Suptask email integration**](/integrations-automations-and-workflows/email-ticketing-setup.md)
5. Set the **recipient email** to:
```
incoming@suptask-mail.com
```
6. **Include the email field** in the notification settings so you can use it in Suptask to populate the requester’s email.
7. **Ensure your Suptask workspace has** [**email integration** ](/integrations-automations-and-workflows/email-ticketing-setup.md)**enabled.**\
If it’s not enabled yet, reach out to your Suptask admin or contact support.
How the email notification can be configured in Tally form in order to capture tickets.
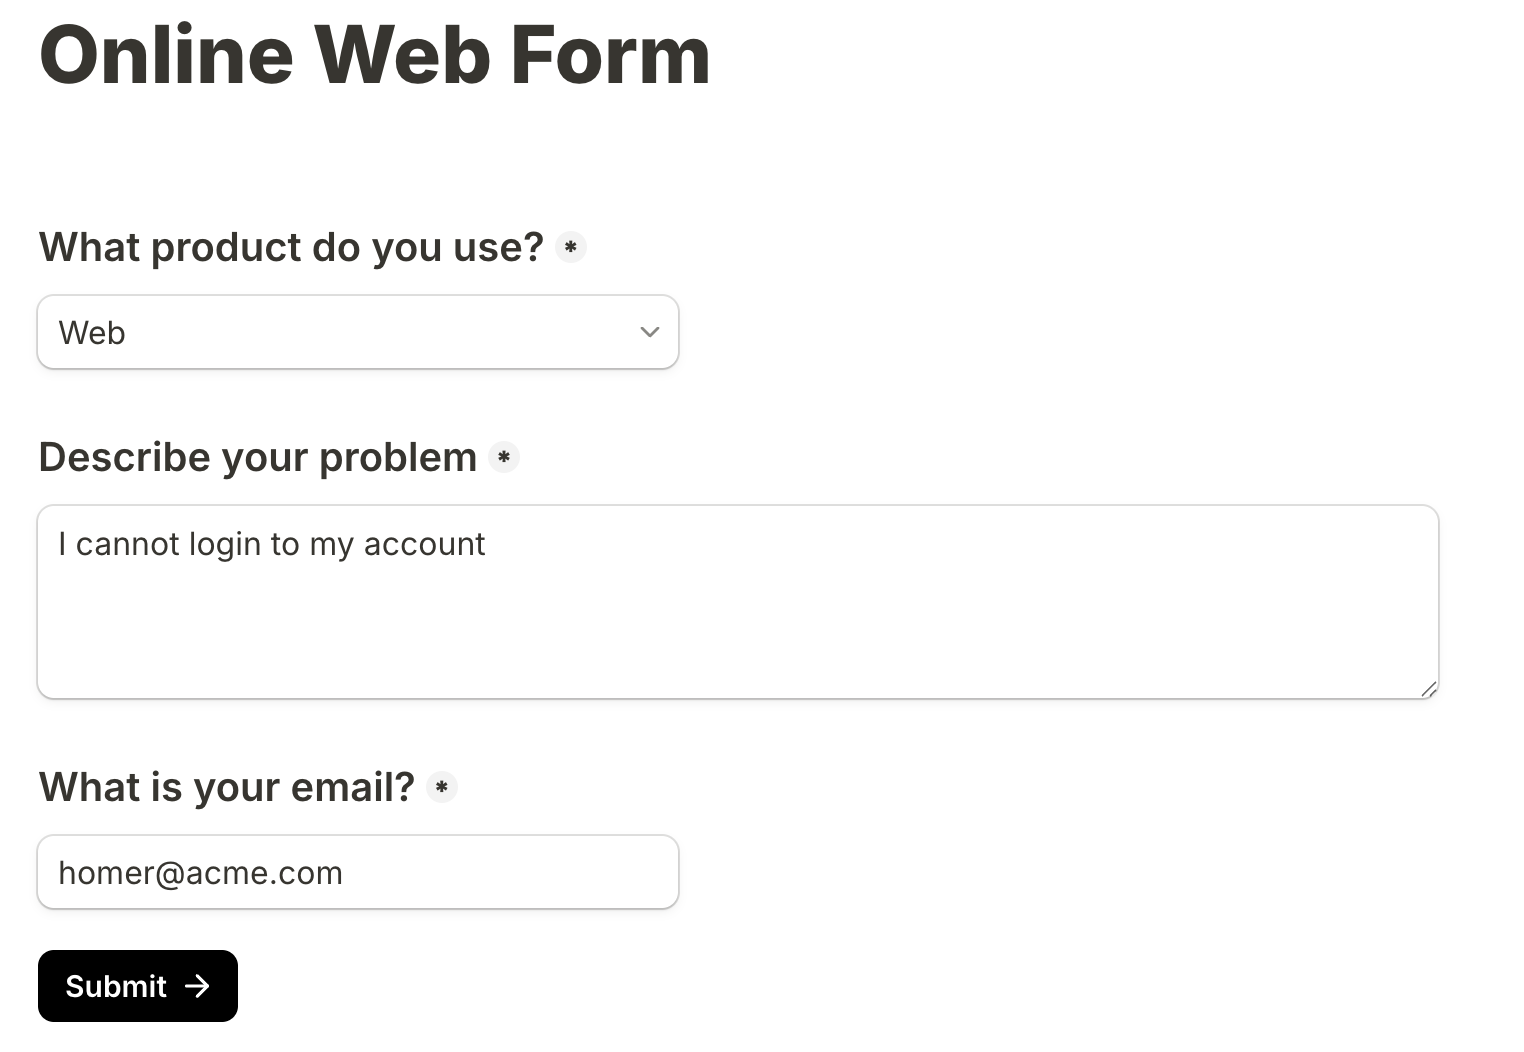
#### **Preview of the form:**
Preview on how the form can look in Tally when it is ready.
***
### What Happens Next?
* Each form submission is sent to `incoming@suptask-mail.com`
* Suptask automatically creates a ticket in your Inbox
* The ticket requester is visible in the email content and can be set so that replies goes to the correct destination.
* Your support team can reply directly via Suptask in Slack, just like any other ticket.
* The requester will receive replies back via the set email
***
### Tips
* Use custom fields in your form to capture extra data.
* Tag or route these tickets differently in Suptask using [AI routing](/suptask-ai/ai-email-routing.md)
* You can test the setup by submitting your form and confirming ticket creation in your Suptask inbox.
***
### Need Help?
If you need help setting up email integration or configuring Tally, reach out to our support team. We’re happy to walk you through it.